 One of the hot things on Facebook this winter has been DIY Snow globe and I thought it looked like lot of fun. So Marcus and I tried it out. I started by researching the potential project. I spend a lot of time reading about projects before I do them. It is almost embarrassing that at times I spend more time on the research on the project at times then the project actually but I am trying to improve the chances of not having a Pinterest/Facebook failure. I watched the video on Facebook, looked it up on Pinterest and even googled the project (ending update a Menards.com).
 Supplies
Canning Jars- You can use any size you want. We used quart jars.Something to put in the jars- This is all up to you. We looked for Christmas ornaments that would fit inside- Marcus actually grabbed a Christmas Village Christmas Tree. Just make sure whatever you put in it will not be impacted by the water mixture.
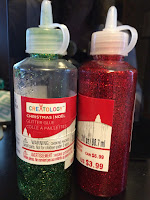
Glitter- pick out whatever glitter you want for the project. We got both small glitter an some shiny starts.
Glue (Hot or Non-Water Soluble)- This is for gluing the ornaments on the lids to keep the decorations in place.
Glycerin- This is actually an optional ingredient. The purpose of this is to create a viscous solution that will slow down the glitter when it is shaken up. In some of the directions they did not include this ingredient at all. Another option would be to use a clear water soluble glue. I didn't do this because I was trying to follow the directions but since it worked so well in the glitter time out bottles, I think it would work here as well.
Other things- We used a few other things just to pretty it up- just be creative and have fun.
A few things I didn't use that were suggested by some directions:
Caulk- It was suggested that this was a good idea to reinforce the lid so it won't leak.
Here are the supplies we used.
Directions
- Once you assemble all of your supplies it is time to go.
-
Start by gluing the ornaments to the lid. Make sure that when you do this, no glue gets on the rim of the lid. If glue gets on the rim it could create a leak. I wiped it off with alcohol to make sure it was good. We actually added some glitter glue to the design as well (you need to make sure this is 100% dry before you put it in the water since glitter glue is normally water soluble). We also add big red balls because they were fun. I actually set my Christmas tree ornament on them to raise the decoration up. I wish I would have raised them either higher and if we do this again I will create a platform so you can see the decorations better.
- Once your glue is completely dry it is time to add the solution. We added the water and the glycerin (not a lot) and the glitter to the empty jar. I kept swirling the glitter around while adding more water and glycerin so I could get to the viscosity that I wanted.
- Well now you are almost one, just need to put the lid on an screw on the top. If you choose to use caulk this would the time to do it.
- Another option at this point would be to decorate the base of the jar but we didn't do that (even though I had actually bought supplies for it) because Marcus's attention span ran out.

Here is our final product. I like them because they are fun an festive.
This project is pretty short and it will take you longer to plan it out and buy the supplies than to actually complete the project!
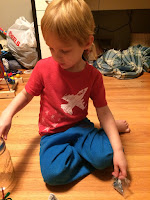
Here are some pictures of Marcus helping to make these.
Here is Marcus's snow globe.
And a video of both of them.


No comments:
Post a Comment